Arch-Ansible: an Ansible playbook to install Arch Linux
Arch-Ansible is a playbook designed to install Arch Linux on a target machine. It was conceived to ease the preparation of virtual machines, but it can also be used to install on bare metal.
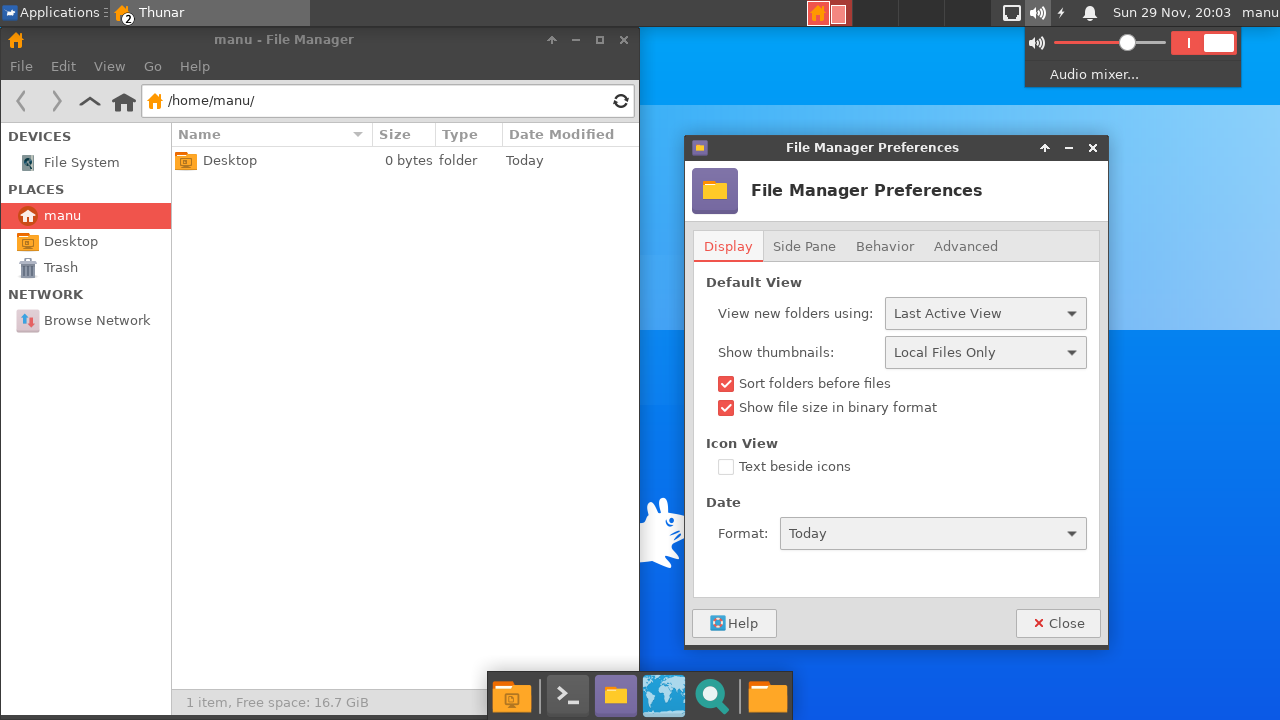
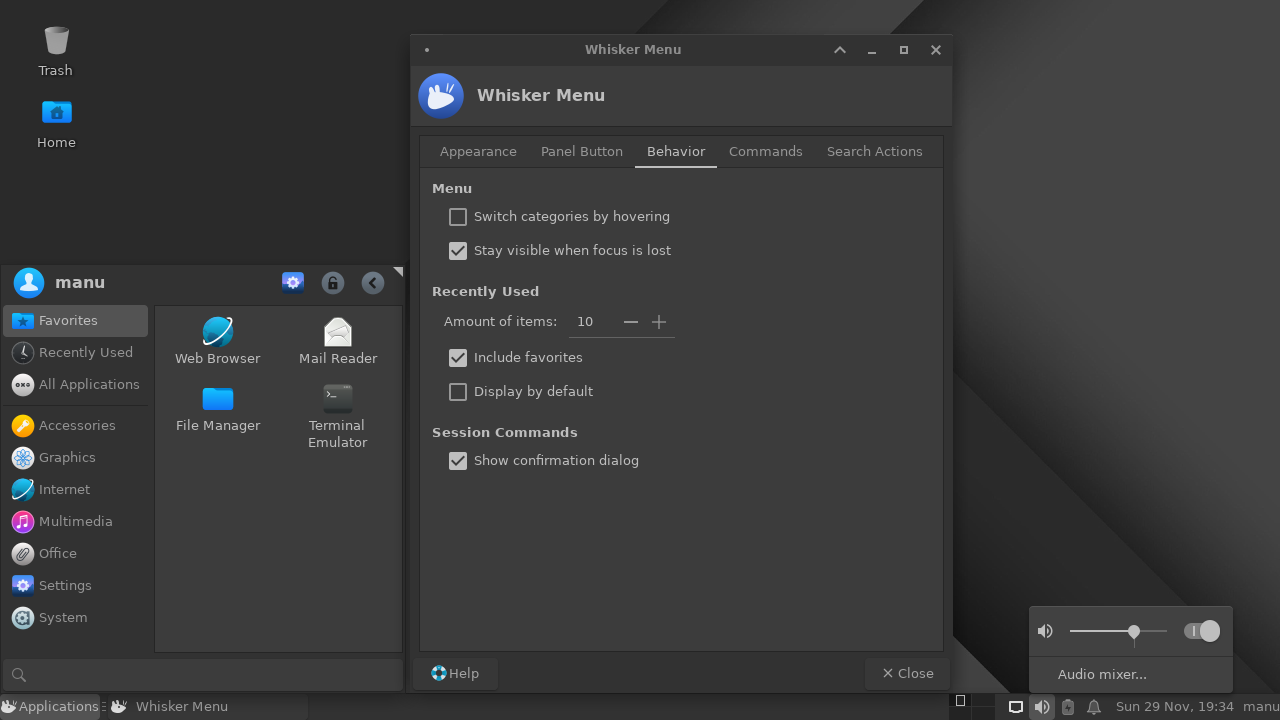
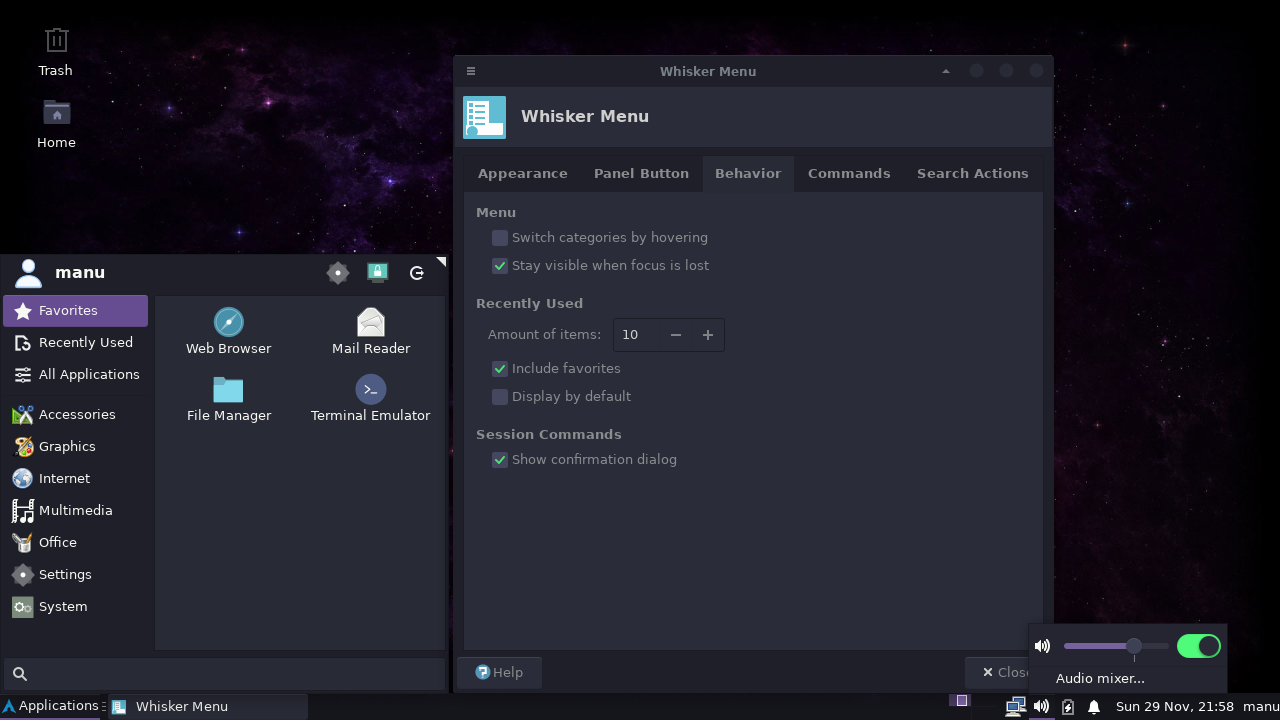
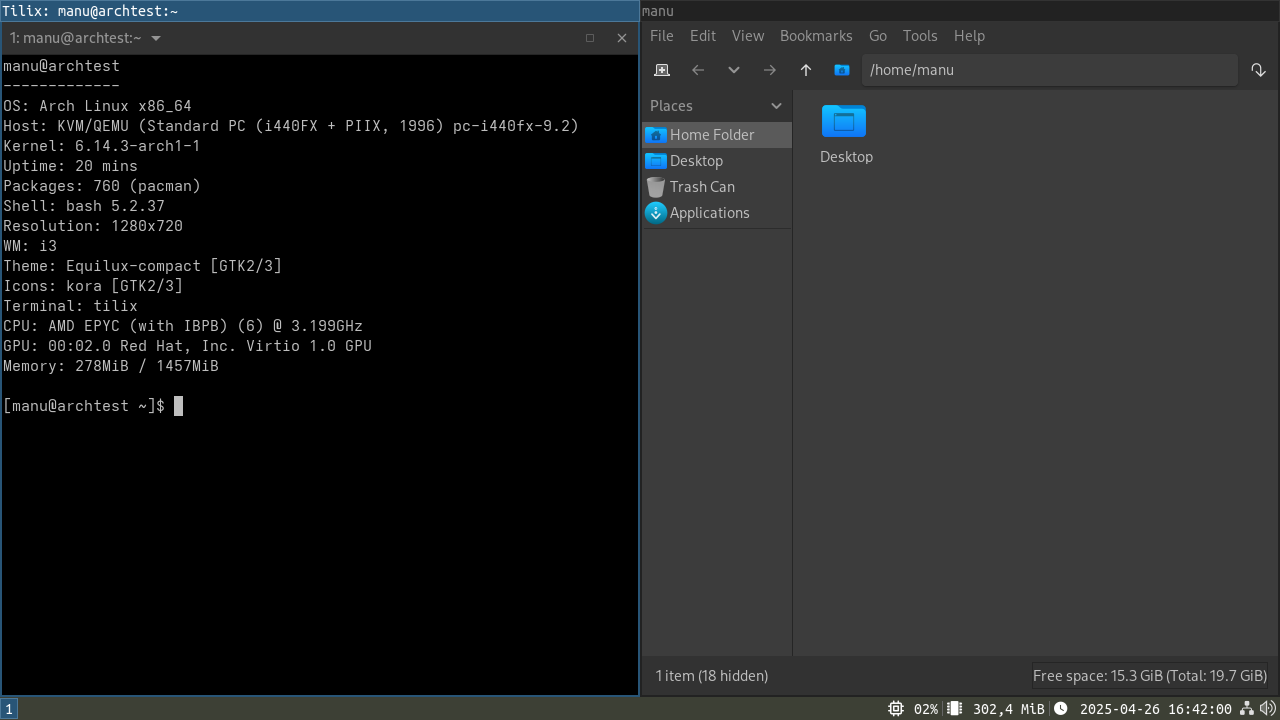
Swipe the following image left or right to see all screenshots.


IMPORTANT NOTE: the new default branch is v0.3.x, which is not backward compatible with v0.2.x. Have a look at the differences in the changelog and in the migration instructions.
Overview
Playbook
arch-ansible is a playbook that performs a full Arch Linux installation to a system or, potentially, many systems in parallel. It is designed with 3 major goals in mind:
- allow rapid provisioning of Arch Linux systems, be them virtual or physical;
- be customizable, avoiding the need to fork it only to add a package or to change the DE;
- allow a well-defined system installation to be defined in code and reused over and over again.
It was conceived as a way to perform reliable, repeatable Arch Linux installations when time is scarce. It is not a full fledged installer and should not be seen as such. In particular, I do not endorse using this playbook as a way to avoid learning how to install and use Arch Linux the Arch Way.
It is also not meant as a post-installation configuration tool: don’t use it against an installed Arch Linux system as a way to add utilities or tweak things.
Ansible version
The playbook has been tested using Ansible 2.9 and higher.
Installed system
Unless some steps are skipped or customized, the installed system will
run XFCE with the Numix-Darkblue theme. No greeter is installed by
default: each user’s .xinitrc is configured to launch XFCE when
calling startx. There are a number of different themes that can be
installed automatically:
- Numix
- Numix-Darkblue
- Equilux
- Dracula
The xfce4-screensaver package is ditched in favor of xscreensaver.
By default, systems installed in VM’s will have it disabled, since I
would assume that the host already has a screensaver/lock. Bare metal
installations, conversely, have it enabled by default to power off the
screen after a few minutes. It is possible to override this behaviour.
The i3 tiling WM is also available.
Optional Bluetooth support can be installed. By default it is only installed on bare-metal installations. This behaviour can be overridden to force-enable or disable it (i.e. to test a Bluetooth dongle in a VM via USB passthrough).
A bunch of default utilities like a PDF reader or gvim a preinstalled.
These are handled by the utils and xutils roles.
Users (including root) get their passwords from
roles/users/defaults/main.yaml.
There is support for installing hypervisor guest additions as part of the process, although it can be disabled. Currently supported hypervisors are:
- VirtualBox;
- QEMU. Using this hypervisor with Vagrant requires the
vagrant-libvirtplugin as well aslibvirtinstalled on your system.
The playbook relies on the Yay AUR
helper to install packages. Using yay instead of the stock pacman
module allows for uniform installation of binary and AUR packages. You
are free to uninstall yay after the provisioning is complete and to
install your favorite AUR helper.
Playbook structure
The playbook is broken into two big parts, identified by tags:
bootstrapis meant to run against a system running an Arch Linux installation media. It takes care of partitioning the disk, installing a bootloader and a set of base packages. Then reboot.mainconfigruns against the installed base system, adding additional packages, installing a DE, creating users and configuring locales. At the end, the system is ready for use.
When used together, they build a complete system from an installation
media. mainconfig can also be run independently of bootstrap,
provided that the initial system state allows for Ansible incoming
connections.
This scenario could be used to provision an existing Vagrant box, for
which bootstrap would be of no use, since it is already partitioned
and base packages are installed. Some minor adjustments might be
required in this case (i.e. Vagrant boxes likely come with pre-installed
VirtualBox guest utilities without X support, which will cause
virtualbox-guest-utils not to install).
A recurring concept in this documentation is the partitioning flow. Initial versions of this playbook used a fixed set of steps when partitioning the drive(s), which was mostly OK when provisioning VM’s as they come with pristine disks, but too limiting when trying to provision physical machines (which may have other OSes installed that must be preserved) or even for advanced VM scenarios (i.e. there was no way to create an LVM system but to do it manually).
So work was spent in trying to decouple the core operations of the playbook from partitioning. The result was the definition of partitioning flow: a standardized set of Ansible roles to which partitioning is delegated. The core playbook does not care any more about how partitioning is done, it simply invokes a user-selectable flow and expects it to set things up. A flow may create traditional single partition layouts, while another can employ linear LVM, and another can setup RAID0.
What is better is that, since the structure of a partitioning flow is well-defined, anyone can write its own flow and plug it into the playbook. So if your system needs a peculiar setup in order to preserve its Windows dual-boot, you can write it once and reuse it many times.
More details here.
bootstrap
The bootstrap phase encompasses the following stages:
- partitioning: disks are partitioned and partitions are formatted and then mounted for later use;
- base package are installed to the target system;
- post-partitioning: tasks which are related to partitioning but can
only be performed after the basic filesystem hierarchy is in place;
this is where one would add entries to
/etc/fstabor add hooks to/etc/mkinitcpio.conf; - the bootloader is installed to the target system.
By design, bootloader installation is considered a part of partitioning.
This is because one cannot choose a bootloader independently of the
partitioning scheme: for example, extlinux cannot be installed on
64-bit ext4, which must be taken into account when creating the /boot
filesystem. Therefore, if partitioning is skipped, bootloader
installation is also skipped.
Installation of base packages cannot be skipped, but it can be
customized by editing roles/base_packages/defaults/main.yaml. It
already contains a very minimal set of packages and there is no
advantage is adding additional tools here.
Partitioning, post-partitioning and bootloader installation can be customized in 3 major ways:
- they can be disabled. This is useful when total control over
partitioning is desired: the user first performs partitioning
manually, then runs the
bootstrapphase with partitioning disabled, so that base packages are installed. Then it manually installs its bootloader of choice. At this point, it can run themainconfigphase; - they can be switched by choosing a different built-in partitioning flow. A global setting controls which partitioning flow is used, and arch-ansible comes with a few of them that cover the most basic scenarios;
- they can be implemented by the user. The same setting that selects a built-in flow can be used to select user-provided flows.
By default, this phase is disabled. To run it, add the bootstrap tag
to the call.
mainconfig
The mainconfig tag marks the tasks that does the heavy lifting. It
configures locales, creates users, sets their initial passwords, and
prepares the system to work behind a proxy. Additional steps include
installing utilities and GUI apps, a desktop environment and applying
default customizations to users.
Roles which install X apps will automatically pull X.org as a dependency.
Most predefined roles can be disabled via variables to cater to specific need (i.e. replaced the default DE) and additional custom roles can be called after the built-in one, for example to add an extra package that requires specific configuration. See here about controlling built-in role execution and here about calling custom roles.
reboot
After both bootstrap and mainconfig the system will be rebooted to
ensure a clean start. This can be disabled by skipping the reboot tag.
Force handlers to run again
If during execution, the playbook fails while executing a handler, the
next time it runs the handler will not run again, because the notifying
task will report an ok status.
As a workaround, you can force all handlers to run again by setting the
variable run_handlers to true. This works by causing all tasks that
trigger a handler to report a changed status.
It works differently than --force-handlers. As per Ansible
documentation:
When handlers are forced, they will run when notified even if a task fails on that host.
While, in our scenario, handlers would not be notified by tasks when
they return ok.
Partitioning flows
One the biggest limitations of branch v0.1.x was that the partitioning
performed by the bootstrap phase was inflexible. You only got
MBR-style partition tables, single root layouts with ext4 and Syslinux
as the bootloader. The IPL code in the MBR was also overwritten at
install time.
While that setup is fine for some scenarios, specifically VM provisioning, when the disk is always fresh, it can be unsuitable when provisioning bare metal systems with other partitions an OSes in place.
To circumvent the problem, the fixed roles that implemented partitioning
have been replaced with the concept of a partitioning flow. A
partitioning flow is a collection of roles, each one taking care of a
specific step of partitioning, which are called by the bootstrap phase
at appropriate times. These roles are bundled together into a base
folder, and that folder is placed somewhere where Ansible can find
roles. At that point, a variable is used to specify the base folder
name, and the roles beneath it will be used at install time.
This way, each partitioning flow can be seen as a plugin, providing a pre-canned partitioning scheme for different scenarios (i.e. RAID, LVM, GPT, MBR, different filesystems for root, multipartition layouts and so on).
Writing a new partitioning flow requires writing some Ansible roles. For repetitive tasks this can be a good idea. For one-shot setups, one may find manual partitioning a faster approach.
Ansible also supports collections as a distribution format to publish
groups of roles. The playbook can work with them. This way, each
partitioning flow can be conveniently shared with others as a collection
and downloaded with ansible-galaxy.
Built-in flows
Currently, this playbook come with a bunch of ready-made flows that cover some basic scenarios and are mostly useful for VM provisioning:
disksetup/mbr_singlepart: a single disk is formatted with a single, large root partition using a MBR partition table. The partition will use 32-bit ext4 (required for Syslinux to work) and Syslinux as the bootloader. The IPL of that disk will be replaced to load Syslinux at boot;disksetup/gpt_singlepart: a single disk is formatted with two GPT partitions, a large root partition plus an ESP. The root partition will use 64-bit ext4 and GRUB2 as the bootloader. The size of the ESP can be adjusted and defaults to 512MiB;disksetup/mbr_lvm: a single disk is formatted with two MBR partitions, a large LVM partition plus a small primary boot partition. The LVM partition is used to create a PV and a VG which will then host the root LV, ext4-formatted. The boot partition will hold the kernels for the non-LVM-aware bootloader. Syslinux is used to boot up. The size of the boot partition can be configured and defaults to 512MiB. Don’t make it too small if you want to install additional kernels;disksetup/bios_gpt_btrfs: a single disk gets a GPT label and two partitions. The first is a 1MiB BIOS boot partition for GRUB to use and the second is the btrfs root. The root gets at least two subvolumes, one for/and one for snapshots mounted at/.snapshots. By default/homealso gets its own subvolume, but this can be disabled by tweakingpartitioning_priv_extra_subvolumes. The same variable can be used to define additions subvolumes, like/var.grub-btrfsis pre-installed and snapshots of/will automatically appear in GRUB.
Flow structure and location
Partitioning flows must reside under a path that Ansible uses when searching for roles. By default, the playbook restricts those paths to:
$ARCH_ANSIBLE_ROOT/ansible/roleswhere built-in roles reside. All built-in flows are grouped underdisksetup, that is why you need to refer to them asdisksetup/$FLOW_NAME, such asdisksetup/mbr_lvm;$ARCH_ANSIBLE_ROOT/ansible/extra_rolesis meant to store third-party flows, so that they don’t mix up with built-in stuff.
For example, if you place your new flow foopart under
$ARCH_ANSIBLE_ROOT/ansible/extra_roles, your roles will reside at
$ARCH_ANSIBLE_ROOT/ansible/extra_roles/foopart, it base folder.
Each base folder contains one subfolder per role, and each flow is composed of exactly 4 roles:
api: it is called before any other role in the flow to determine which version of partitioning flow API the flow is exposing. Currently, there is onlyv1, which is what is described here. Future versions of the playbook may define additional API version, and this version declaration will allow existing flows to keep working;partitioning: this is called before the base system is installed. It is meant to prepare and mount the partitions for the target systems, so that base package installation can use them. This role does things like defining partitions, formatting them, and mounting them;postpartitioning: is run after the base packages have been installed. This means it can assume a standard filesystem hierarchy being present on the new root, including standard Arch tools and configuration files. This is the place where things like generating the fstab or tweaking the initcpios are done;bootloader: is run last to install and configure the bootloader.
Bootloader installation is considered part of partitioning, simply because some partitioning choice may rule out certain bootloaders or require special installation options.
When implementing a role, feel free to call on other built-in modules to
save some coding. Roles such as genfstab and syslinux are there to
be used . For example, if your bootloader role can simply delegate
everything to syslinux, just make it an empty role with a dependency
on syslinux.
A typical flow tree structure is as follows:
mbr_lvm/
├── api
│   ├── tasks
│   │   └── main.yaml
│   └── vars
│       └── api.yaml
├── bootloader
│   └── meta
│       └── main.yaml
├── partitioning
│   └── defaults
│       └── main.yaml
│   └── tasks
│       └── main.yaml
└── postpartitioning
    ├── meta
    │   └── main.yaml
    └── tasks
        └── main.yaml
Have a look at built-in flows for an example.
When storing flows as collections, individual roles will be found under
the standard roles folder under the collection folder. The playbook
can cope with both structures, since the naming scheme of the variable
pointing to the flow makes it obvious if we are talking about a
collection or not, and role lookup rules are changed accordingly.
Flow interfaces
Each flow roles may need to pass information to other parts of the
playbook, both to roles in the same flow and to built-in roles. To make
this easier while avoiding conflicts, a simple naming scheme is defined
for such information. In general, each role provides information to
other roles by means of facts, which can be set using the standard
set_fact module.
Internal API
If a flow role needs to define a fact to be consumed by a role in the
same flow that is called later (i.e. pass data from partitioning to
bootloader, for example), that fact should follow the convention that
its name looks like:
partitioning_priv_*
in order to avoid name clashes with other parts of the playbook.
For example, partitioning_priv_root_devnode can store the device node
used for the root partition, which is established at partitioning time
and later used to install the bootloader. Apart from the prefix,
flow-local fact names are arbitrary.
Public API
In order to work with the rest of the playbook, a partitioning flow must adhere to the following:
-
it MUST contain an
apirole, which MUST accept a variable namednamespacewhen invoked. After execution, a fact named like the value ofnamespaceMUST be defined, holding API information for the flow. API information is formatted as an object holding the following fields:# API version implemented by the flow. Currently only v1 is defined. apiVersion: partitioning.arch-ansible/v1Future API versions may add more fields, to allow for more flexibility.
A simple way to implement the
apirole is to store API version information in a file undervars/, then useinclude_varsto load them under thenamespace(which can be passed as thenamefield toinclude_vars). By not calling the vars filemain.yaml, it can be ensured that such variables will not pollute the global variable namespace and will be confined under a specific top-level object.
v1
If offering the v1 API, the flow:
- must provide the following roles:
partitioningpostpartitioningbootloader
- when called, the
partitioningrole MUST define where the root partition (and all other partitions mounted beneath) is mounted, by defining thepartitioning_root_mount_pointfact.
Often, one will simply use /mnt as the root mountpoint, so it will
define a default variable with that value, which is made available to
other roles when this one is imported.
Configuration
By design, global configuration items are those which are used by
multiple roles and are stored in group_vars/all/00-defaults.yaml.
Other variables, which are local to a specific role, are stored under
roles/$ROLE/defaults/main.yaml,
Defaults can be overridden by placing a new file under group_vars,
host_vars or using the command line. This way, one can keep the
default configuration and just change the target system hostname or
locale.
Global and role-local configuration variables are documented in details inline in the YAML files themselves. The following sections give an overview of the high-level concepts behind them.
For ease of reference, an automatically generated list of all playbook variables is available here.
Global configuration
Portable image
global_portable_image: False
This variable controls whether the resulting installation should be site-independent or not. If set to false, the playbook assumes that settings such as custom repos and proxy configuration must persist in the installed system. If set to true, such settings will be reverted in the final setup.
This is useful, for example, if the installation process requires using an HTTP proxy, but the system is then going to be moved to a different network where a proxy is not needed. A typical case is provisioning a VM image with Packer from behind a proxy: the final image should not carry such site-specific proxy settings if it is going to be shared with a wider audience.
These are the installation elements affected by this flag:
- HTTP proxy settings: they will be evicted from the final system and
all customization needed to use them effectively (such as
sudoerstweaks preserving them across calls tosudo, shell profiles adding them to the environment, …) will be undone; - custom repositories and mirrors: they are removed from
/etc/pacman.conf.
Proxy setup
If working behind a (HTTP(S)) proxy, add appropriate definitions for
http_proxyhttps_proxyno_proxy
This will automatically trigger proxy-related tasks and configure the installed system to work behind a proxy (by setting appropriate environment variables).
Tags
The following tags can be used to enable or disable specific parts of the playbook:
bootstrap: enables or disables the whole bootstrap phase, which runs against the Arch installation media. It is disabled by default, because the bootstrap phase performs potentially dangerous operations like partitioning and formatting. Keep disabled when provisioning ready-made base systems like Vagrant images. Enable when provisioning bare metal systems or Packer VM’s;mainconfig: disables or enables the entire mainconfig phase. This is run by default;reboot: skip it to disable reboots at certain points of the installation. Useful if the reboot should be avoided: the Packer template provided with Arch-Packer is an example of this;partitioning: disables the use of a partitioning flow, leaving full control over partitioning in the hands of the user.
More fine-grained control over specific roles can be exerted via the
following variables, settings them to a boolean value. Their default is
true, enabling roles. Setting them to false disables a specific
role. The role name is given by the variable name.
virtguest_enabledxfce_user_customizations_enabledyay_user_customizations_enabledttf_fonts_enabledutils_enabledxutils_enabledbluetooth_enabledi3wm_enablednix_enabled
Custom roles
It is possible to hook custom roles into the mainconfig phase, to
accommodate special setup needs. This works like this:
- add any extra role you want to call under
extra_roles/, either manually or viaansible-galaxy; - create an entry point role, which simply calls on all the others, in the desired order and passing them any required variables;
- specify that you want to run custom roles by setting the
custom_roles_entry_pointvariable to the name of the role defined in the previous step; - the playbook calls on your roles after all the built-in ones.
With this scheme, you could, for example, disable the default role installing XFCE and the add a custom role installing Cinnamon, without touching the playbook code: you just need to pull roles and define some extra variables.
Roles
The following sections give a brief description of available roles. For a detailed explanation of each role configuration options, look at its own defaults file.
For each role, a flag list is given according to the following structure:
[--]
 ││
 │├ m Can be called multiple times with different input variables
 │└ s Should be called just once. If called multiple times, it will
 │     either be idempotent or undo later modifications (i.e. if you
 │     create users with the `users` role, manually change passwords
 │     and call it again, the passwords will be reset).
 │
 ├─ - Can be used in both the bootstrap and mainconfig phases
 ├─ b Can only be used in the bootstrap phase
 └─ m Can only be used in the mainconfig phase
It is used to distinguish roles which only work in specific playbook
phases from those that can be used freely. Also, some roles are meant to
offer service to other roles (such as packages) while others do more a
extensive setup and it makes no sense to call them multiple times as
they are idempotent (like virtguest).
base_packages
Flags: [bs]
Installs the base packages to the system being provisioned via pacstrap.
bluetooth
Flags: [ms]
Installs packages required for Bluetooth functionalities.
clean
Flags: [ms]
Cleans installation leftovers (such as package caches) and reverts some configuration for portable images.
configure
Flags: [bs]
Post-bootstrap minimal configuration of the installed system. Mainly,
it ensures that things like networking and ssh will start automatically
at boot time, so that Ansible can connect to the installed system after
reboot.
custom_repos
Flags: [-m]
It is possible to add extra repositories or mirrors during the installation process. They will persists in the final system if it is not configured as a portable installation.
Both repositories and mirrors take precedence over those already configured. This means that:
- additional repositories will take precedence over
core,extraand other official ones, so they can be used to override some official package with a local version; - additional mirrors will be placed at the beginning of the mirrorlist so that pacman tries them first, and then moves on to other mirrors if the are all unreachable.
It accepts a state variable, to be set to either present or
absent. present will add repository definitions to pacman files,
while absent will remove them.
de_eyecandy
Flags: [ms]
Installs themes for GTK2/3/4 and Qt applications, window decorations, some wallpapers and sets system-wide defaults so that they are applied.
Settings are read directly by GUI toolkits (using files such as
~/.config/gtk-3.0/settings.ini or variables such as
QT_STYLE_OVERRIDE so they are honored under most DEs or WMs, unless
the GUI environment overrides them with its own settings.
genfstab
Flags: [bs]
Generates a fstab file from the mountpoints found under a directory
tree. A typical use is to call it from the postpartitioning phase of a
partitioning flow in order to generated the fstab corresponding to the
partitions used during the installation.
When invoked, a chroot variable must be specified, to indicate where
the root partition (and other partitions under it) is mounted.
hostname
Flags: [-s]
Sets up the host information in various files, such as /etc/hostname
and /etc/hosts. The host domain is set to localdomain.
When invoked, a chroot variable can be specified, to indicate where
files holding host information are to be found. If not passed, the
current root is used.
i3wm
Flags: [ms]
Installs the i3 tiling window manager and configures it with a bunch of keybindings and startup apps to be immediately ready for action. You get:
- Tilix terminal, also in Quake mode;
- dunst for notifications;
- mate-polkit for authentication;
- xsecurelock as the screensaver (only on bare metal or when forced);
- picom compositor (only on bare metal or when forced);
- pcmanfm file manager;
- seahorse key manager;
- rofi to launch apps;
- pasystray to control volume;
- i3-exitx replaces i3 nagbar when quitting.
Unlike Xfce, there is no separate role for customization: vanilla i3 is too “hardcore” and minimal out of the box, so this role will always pull in de_eyecandy to install themes for apps.
By default, the screensaver is only enabled for bare-metal setups, but
this can be controlled via i3wm_screensaver_override. The same is also
true for the compositor, but via i3wm_compositor_override.
kvantum
Flags: [ms]
Installs the Kvantum theme engine for QT5/6 and sets the QT_STYLE_OVERRIDE
variable to kvantum in each user’s .bashrc. It also sets the default theme
for a user’s session to the value specified by the kvantum_theme variable.
This helps getting a better integration of QT apps in XFCE. For example, the GTK theme Equilux and Kvantum’s KvGnomeDark themes work well together (my personal tastes, still better than blinding white apps in my dark desktop).
locale
Flags: [ms]
Set system locale information, such as the keymap, the locale and the character set, the timezone.
makepkg
Flags: [mm]
This helper role downloads PKGBUILD tarballs from the AUR, builds them
and installs the resulting package. It lacks any dependency resolution
capability or any other feature one would expect from any AUR helper,
that’s why it is normally only used to install yay.
It accepts a packages variable, which should contain a (YAML) list of
packages to install. If a package has AUR dependencies, list them all,
with dependencies coming before dependants.
packages
Flags: [mm]
Installs packages from either the AUR or regular repos. It delegates the
job to yay.
It accepts a packages variable, which should contain a (YAML) list of
packages to install. Since it harnesses the full power of yay, you can
mix AUR and regular packages in the list and don’t have to worry about
dependencies or ordering. This is the role to invoke when you need to
install additional stuff.
pacstrap
Flags: [bm]
Uses pacstrap to install stuff to a system under installation.
It accepts a packages variable, which should contain a (YAML) list of
packages to install. No AUR packages can be used here since pacstrap
only handled regular repositories.
disksetup
Flags: [bs]
If the bootstrap phase is executed and partitioning is not skipped,
this role is called to drive a partitioning flow, determined by the
value of the variable disksetup_roles_prefix:
disksetup_roles_prefix: disksetup/mbr_singlepart/
Note that this is a prefix: when combined with the name of a role to
call (i.e. bootloader) it should yield something which fully
identifies the role. For roles stored under role paths, this should be a
relative pathname, such as disksetup/mbr_lvm/partitioning/. For roles
stored in collections, this should be their fully qualified role name,
such as arch_ansible.mbr_lvm.partitioning..
Since the role name is provided at call time, the prefix should contain
everything up to it, including the trailing / or . This is way the
default value ends with /. For a flow stored as a collection, the
prefix ends with a ..
nix
Flags: [ms]
Installs the nix package manager in multi-user (daemon) mode, adds an
initial channel to it (default is unstable) and adds the profile bin
folder to the PATH of each user. Each user gets its own, independent
profile.
nix_packages
Flags: [mm]
Installs packages using nix-env to the profiles of all configured
users.
passwordless_sudo_user
Flags: [ms]
Creates a dedicated user which can call sudo without being asked for a
password. It is used to build packages, since it can become root to
install missing dependencies and the built package.
A handler ensures that, at the end of the play, this user is evicted from the system.
proxy
Flags: [-m]
Configures the system to use an HTTP(S) proxy. In particular:
- it stores proxy variables into a global shell profile, imported by all users when a login shell is run;
- configures
sudoto preserve those variables; - tells
pacmanto usecurlto grab files. This was done in order to have better control over the download timeout:pacman’s built-in downloader will, by default, abort a download if no data are received for about 10 seconds. There is an option to disable this, but AFAIK, it can only be passed via the command line and cannot be configured viapacman.conf. When setting a custom downloader, conversely, you can specify the full command line, including timeout related options. This point is important because many corporate proxies will implement some store-check for malware-forward logic which can break the defaultpacmantimeout.
It accepts a state variable, to be set to either present or
absent.
syslinux
Flags: [bs]
Installs syslinux (more accurately, extlinux) as the bootloader for
the new system. It assumes a legacy BIOS system and MBR partition tables
for the disk where /boot resides.
It automatically tries to detect most things on its own. The
configuration file with boot entries is dynamically generated from the
kernels and initramfs files present under the new system’s /boot, so
one does not have to list them explicitly.
Also, it detects which device nodes are involved by looking up device
nodes associated with the new system’s root partition and /boot. The
root partition is used to extract the UUID that ends up in boot entries,
while the device mounted under /boot is used to install the IPL (the
code that goes into the MBR). For example, if /boot is mounted from
/dev/sda3, the IPL code will be installed to /dev/sda.
The only tunable parameter is given by the ipl variable, a boolean
which controls if the IPL code should be installed or not. By default it
is set to yes. It makes sense to disable it if you plan to chain-load
syslinux from a different bootloader.
ttf_fonts
Flags: [ms]
Installs a bunch of extra fonts.
users
Flags: [ms]
This role creates user accounts, sets their passwords and makes them able to use sudo, if appropriate. It should be a dependency of all those roles which copy files to home dirs or expect users/home folders to exist.
After execution, it will have defined two variables that can be used to iterate over user information:
users_namesis a list holding all non-root accounts defined in the defaults (or overridden somewhere else);users_createdis the output of theuserAnsible module and contains useful info about created users, such as their home dirs. One can use them like this, to avoid assuming where home dirs are placed or their names (as we may allow setting home dir names in the future, rather than using the username):
name: Copy a file to user home
copy:
  src: foobar
  dest: "{{ users_created | user_home(item) }}/.foobar"
loop: "{{ users_names }}"
Note that user_home is a custom filter that simply extracts the home
path for a user name.
Modules depending on users are allowed to access those two variables
as role output.
All user info (such as username, password, additional groups) is stored into this module’s defaults file. As usual, it can be overridden in host or group variables.
users_fixup_faillock can be set to true to apply a patch to the way
PAM handles system authentication. By default, when the pam_unix
module returns any error during authentication, pam_faillock is
triggered to increment the login attempt counter for the user: when it
reaches a system-defined maximum (usually 3) the account is locked for
10 minutes.
This poses a problem when your screensaver or authentication tool can time out or be cancelled. It will return an error code to PAM and thus cause the counter to increment. After a number of timeouts, your account will be locked, even if you didn’t type anything wrong!
PAM has a specific code that reports authentication failures, while
others report other kinds of problems (like the inability to open a
module) or generic failure. The patch simply tells PAM not to call
pam_faillock in face of non-authentication errors.
It is recommended to turn this option on if using xsecurelock (the
default for an i3 setup) to avoid the problem mentioned above. For
xscreensaver this is not required, as it kills itself upon timeout or
user abort, and never reports back to PAM.
utils
Flags: [ms]
Installs a bunch of CLI utils. This is where additional utils should be
added. If a tool depends on the X Window System somehow, it should go
under xutils.
virtguest_force
Flags: [ms]
By default, the playbook uses facts to detect if the target system is
running under an hypervisor. If so, some behaviour will be adjusted
accordingly: for example, guest additions are installed and enabled
automatically and the screensaver is disabled by default. If the
hypervisor is unsupported, the playbook bails out. To proceed under an
unsupported hypervisor without its additions, set the
virtguest_enabled variable to false.
virtguest_force can be used to override the detected hypervisor or to
force a bare-metal installation to be treated like a VM installation.
This is only useful should Ansible ever fail to correctly detect that we
are running under a VM, or fails to detect the hypervisor.
All roles that inspect facts to detect a hypervisor should depend on this one, so that related facts can be overridden appropriately.
virtguest
Flags: [ms]
virtguest takes care of doing the real work for the detected
hypervisor, as reported by Ansible and potentially overridden by
virtguest_force. It installs guest additions and any other package
required for optimal execution under an hypervisor.
When provisioning a QEMU VM, the QEMU guest agent and the SPICE agent are installed. Also, an autostarted desktop entry is created to handle screen autoresize inside the guest when the host window is resized. This is not required for VirtualBox.
wireless
Flags: [ms]
Ensures that the wireless regulatory domain is configured properly.
By default, it will set the regulatory domain to the same country used
in the locale configuration: if you set your locale to it_IT, the
country will be IT. It is possible to override this behaviour by
specifying the desired country code in a variable. Have a look at the
defaults file for the details.
Note that this role is always executed by default, even in VM installations. The rationale is that if one attaches a WiFi dongle to the machine via USB passthrough or migrates the system to a physical machine, there is no risk of forgetting to configure it and generating interferences.
xfce
Flags: [ms]
Installs the XFCE desktop environment.
xfce_user_customizations
Flags: [ms]
This role does two things:
- it installs packages related to XFCE eyecandy (themes, icons, engines);
- copies configuration files to each user home folder, in order to set the default look and feel.
Tweak the defaults to select which themes are to be installed and which should be used as the default for users. It is currently not possible to specify themes on a per-user basis.
The role can optionally install Kvantum in order to give a degree of control over theming of QT apps.
NOTE: Since introducing alternative DEs/WMs, most activity related to
eye-candy setup has been moved to de_eyecandy.
Similarly, .xinitrc handling now partains to xinitrc. This
role calls them to do most of its job.
xinitrc
Flags: [ms]
Copies a working .xinitrc under all users’ homes, so that it is
possible to launch a GUI session via startx.
This .xinitrc will try to start the first usable session according to
the following list:
- if
startxis run with an argument, that argument is started as the session:startx startxfce4orstartx i3. Otherwise, if no argument is given; - if the
XINITRC_DEFAULT_SESSIONenvironment variable is defined and non-empty, it is used instead. You can set it in your.bashrcto control yout default DE. Otherwise: - it starts Xfce if it is installed. Othwerwise;
- it starts i3 if it is installed. Othwerise;
- it bails out.
Note that when the startx argument or XINITRC_DEFAULT_SESSION are
expanded, they are used unquoted. This means that commands can have
arguments, but also that if anything contains spaces, things won’t work.
In that case you should wrap the session command in its own script.
xorg
Flags: [ms]
Installs the X Window System, specifically X.org.
This role is usually pulled in as a dependency of other roles which
install GUI applications, such as xutils.
xscreensaver
Flags: [ms]
Installs xscreensaver. This tool has been granted a role on its own,
rather than simply being another entry under xutils, because its
configuration depends on the installation type.
When doing bare-metal installations, the screensaver is enabled by default and will lock the screen after a few minute of inactivity as a security measure.
Conversely, VM installations will have it installed but disabled, because one would assume that the host itself already has a screensaver and there is no reason the get asked for two different passwords every time the screen is locked.
The defaults provide a way to override this behaviour.
xutils
Flags: [ms]
Installs a bunch of GUI utils. This is where additional grtaphical utils
should be added. If a tool does not depend on the X Window System
somehow, it should go under utils.
yay
Flags: [ms]
Installs yay from the AUR.
yay_user_customizations
Flags: [ms]
Copies yay configuration files to each user’s home directory. This
does not affect the use of the packages role, because it passes all
options explicitly on the command line. It is meant to provide
reasonable defaults to users which desire to use yay as their AUR
helper after the system has been installed.
Simple customization
Add a non-X11 package
If you want to add a new non-X11 package to every installation and it
does not require special configuration, copy the package list in
roles/utils/meta/main.yaml to a group_vars file and then customize
it. Your list will override the default.
Add an X11 package
If you want to add a new X11 package to every installation and it does
not require special configuration, copy the package list in
roles/xutils/meta/main.yaml to a group_vars file and then customize
it. Your list will override the default.
Add a package that requires configuration
If you want to add a new package to every installation and it requires special configuration (i.e. configuration files to be copied), create a new role for it that includes files and templates, then hook it via custom roles.
Delegate the actual installation to the packages role. AUR packages
are fine since yay is used. Then do the rest of the setup.
- import_role:
    name: packages
  vars:
    packages:
      - my_package

- copy:
    src: my_package.conf
    dest: /etc/my_package.conf
This approach allows for the maximum flexibility (i.e. to install and
configure an additional DE). If the package requires X11, add the xorg
role to its dependencies.
Side projects
This project comes with two side projects, designed to ease the provisioning of VM’s with Arch-Ansible. They rely on HashiCorp Vagrant and Packer and can be found under the folders with the corresponding names. For simplicity, I’ll refer to them as Arch-Vagrant and Arch-Packer. Click the links to read their own docs.
Both projects honor the following environment variables:
-
ARCH_ANSIBLE_HEADLESS: set it to any non-empty value (ex.1,true) to suppress the hypervisor GUI during provisioning. You can still access the VM screen by opening the appropriate management GUI (ex. VirtualBox,virt-manager). Machines created vialibvirtwill not display their GUI by default, regardless of this setting. Also, Packer machines using QEMU starting without GUI cannot be switched to GUI mode during provisioning.By defaults, GUIs are shown.
ARCH_ANSIBLE_LIBVIRT_USER_SESSION: if set to any non-empty value, and libvirt is being used to create a VM, connect to its user session, rather than to its system session.ARCH_ANSIBLE_CPUS: set the number of CPUs used by VMs.
Integration with pkgproxy
If you are going to do multiple installations using arch-ansible in a short interval, it may be best to save and reuse downloaded packages across runs. To do that, the simplest way is to use the pkgproxy tool, which acts as a cache between an Arch Linux mirror and your system.
It is very simple to use: you run it, configure it as a mirror for your
system, and every downloaded package will get stuffed into its cache.
arch-ansible has support for additional mirrors, so it is easy to tell
it to use your local pkgproxy instance by adding an extra file as
described in Configuration. For example, you may add
the following contents to group_vars/all/50-pkgproxy.yaml:
custom_repos_servers:
  - http://10.0.2.2:8080/$repo/os/$arch
The exact hostname and port will vary depending on where you run pkgproxy. The example above assumes that Arch is running inside a VM, while pkgproxy is running on the host, on port 8080.
Manual partitioning
By disabling the partitioning tag, one can take control of the
partitioning steps performed by the bootstrap phase. This is useful
when:
- machine-specific configuration of disks is required, for example to preserve installed systems;
- these operations are going to be performed one-shot, so the time spent writing a new partitioning flow cannot be justified.
The user will be responsible for:
- partitioning the drive and formatting partitions;
- installing a bootloader;
- installing any extra tool and editing any file required for the system to boot.
These are the steps that need to be performed:
- partition the drives and format the volumes. Any tool can be used here, including the Arch installation media or any other live media;
- launch the Arch installation media, then mount all the partitions you
intend to make part of the system under some mountpoint (typically
/mnt, although this is not mandatory); - now you can launch the playbook with the
bootstraptag enabled and thepartitioningandreboottags disabled. You must set the Ansible variablepartitioning_root_mount_pointto the value you chose as the root partition mountpoint; the playbook will proceed and install the base packages and perform basic system configuration; - at this point, the system would not boot since not bootloader is installed; from the Arch media, install you bootloader of choice;
- reboot into the newly installed system;
- proceed with the rest of the installation by running the playbook without specifying or skipping tags.
Bare metal installation
NOTE: unless noted, all commands are intended to be run on the target machine.
arch-ansible can provision physical machines, not just VM’s. But some care must be taken in preparing the host/group variables files, plus some network-related actions. Also, you will need a separate PC to be used as the Ansible controller, which must be able to connect to the target machine.
Note: before running the following steps, keep in mind that the
bootstrap tag enables tasks which will partition, format, and install
a new bootloader to your machine. This may cause data loss or require
you to reinstall your bootloader to get a preinstalled OS to boot
again. Triple check the chosen disk and partition in the global
configuration. Remember that the IPL for that disk will be overwritten,
so if it already contains the loader for a different system, that system
will no longer boot after the installation. If possible, you can then
configure Syslinux to chainload the other system.
The target will be rebooted multiple times during the installation and if you are using DHCP the IP may change across reboots. You may want to configure your local DHCP server to give the target a fixed IP by using a MAC address reservation.
When rebooting from the install media into the installed system, it would be useful if the system firmware were configured to automatically boot into the new system, otherwise the installation media would boot again and the installation could not proceed.
The target will need to be accessible over SSH. Ensure that
/etc/ssh/sshd_config allows root login: it should contain the
following line:
PermitRootLogin yes
Then give the root user a password:
# passwd
And start SSH:
# systemctl start sshd
At this point incoming connections are allowed, but it is better to let
SSH use a private key for authentication rather than a password. Let’s
generate a new keypair (which can be reused across all installations;
note the -N '', which means the private key is unencrypted so no
password is asked when connecting) and copy the public part to the
target:
# On the controller
$ ssh-keygen -N '' -f ~/.ssh/arch-install
$ ssh-copy-id -i ~/.ssh/arch-install root@your.machine.local
Edit your $HOME/.ssh/config file to associate your target system with
this key:
Host your.machine.local
IdentityFile ~/.ssh/arch-install
IdentitiesOnly yes
Edit the Ansible inventory file to point to the target machine.
Apply any other customization via host/group variables. And finally run:
# On the controller
$ ansible-playbook -i hosts.yaml --tags bootstrap,mainconfig site.yaml
After installation is complete, you can delete the key pair generated above, from both the controller and the target.
Installing multiple DEs/WMs side by side
It is possible to install multiple GUI environments side by side. However, since some settings are shared (there is just a single GTK3 configuration file, for example) and some services compete for the same DBus names, doing so may result in a mix-up of them.
At the time of writing, I’d suggest users to pick only one and disable the other.
Migrating to a non-backward-compatible playbook version
0.2.x ➔ 0.3.x
Deprecated stuff
The following have been removed:
users_hash_roundsandusers_override_passwd_hash_systemwidevariables have been removed. Configurations referring to them in variables or filters will raise errors about undefined variables. Configurations that just set them will keep working, but they no longer have any effect.virtguest_virtualbox_use_mplugdandvirtguest_use_mplugdhave been removed. These variables were unused since a long time, but were kept to avoid breaking references to them. If your configuration refers to them, please update it to avoid undefined variable errors.passlibis no longer installed alongsideansible.- The
sha512_hashcustom filter for password hashing has been removed. All hashing is now done directly viachpasswd.
Packer invocations
Plain use of Packer from the CLI is now unsupported. The packer-wrapper.sh
(packer-wrapper.ps1 under Windows) script from Arch-Packer must
be used instead. It passes all its arguments down to Packer, but it also exports
some environment variables which are expected by the template. See
Arch-Packer documentation and the changelog for more information.
0.1.x ➔ 0.2.x
Passwordless-sudo-enabled user
global_passwordless_sudo_user has been deprecated. Roles that need it
should depend on the passwordless_sudo_user role and get it from
passwordless_sudo_user_name.
Changes to user management
User account information have been harmonized, eliminating some unused objects and splitting root info from the rest of the users, since most attributes do not make sense for root.
If you have an existing configuration made of host/group variables you wish to migrate:
- delete the now deprecated
global_admins; -
move the contents of
rootfromusers_infotousers_root_info:# Go from this: users_info: root: XXX other_user: YYY # to this: users_info: other_user: YYY users_root_info: XXX
All modules that want to iterate over users should replace
global_admins with users_names. They should also depend on users.
The contents of users_names are generated from users_info, which
removes the need to keep the user name list and the user information
strcture in sync, as in the previous branch.
More on this role in users.
Changes to partitioning
The partitioning phase has been reworked to allow for more flexible partitioning and bootloader installation, including the case of users dropping their own partitioning roles to automate specific deployments without the need to fork and customize.
More info can be found in the bootstrap, disksetup and partitioning flows sections.
The disksetup/mbr_singlepart partitioning flow produces exactly the
same results as the previous branch.
Changes to tags
Most tags have been eliminated because they have been replaced with variables enabling or disabling specific roles. The advantage of this choice is the ability to enable or disable roles on a per-host basis. Refer to this section for a list of supported tags and their intended usage. It also mentions how to disable specific roles via variables
Changes to the hostname role
It used to accept a root variable giving the root where
/etc/hostname and friends are to be found. It has been renamed to
chroot for consistency with other modules.
Changes to ansible.cfg
The local configuration file restricts collection and role lookup paths to locations defined within the playbook itself, to reduce the risk of unexpectedly importing roles from the system.
These paths are:
$PROJECT_ROOT/ansible/collections$PROJECT_ROOT/ansible/extra_toles